In the latest update of my WalkerOGL project, I've taken significant strides by incorporating model importing with ASSIMP and enhancing the lighting of the rendered objects. This step not only marks the progress in my OpenGL journey but also showcases the power of realistic lighting in computer graphics.
Model Importing with ASSIMP

To kick things off, I utilized ASSIMP (Open Asset Import Library) to import models into my project. I began with a spider mesh, which helped me understand that meshes contain normals for each vertex—these are essential for lighting calculations.
The complexity of model importing led me to refer to OGLDev's comprehensive tutorials, especially this tutorial on ASSIMP. With its guidance, I was able to establish a BasicMesh class that loads external models and maps textures effectively.
After getting a simple model to work with, and with normals for each vertex, I'm ready to begin working on lighting.
Phong Lighting
After research, it seems that the phong lighting model will be the best implementation for this project, as I am still new to graphics programming.
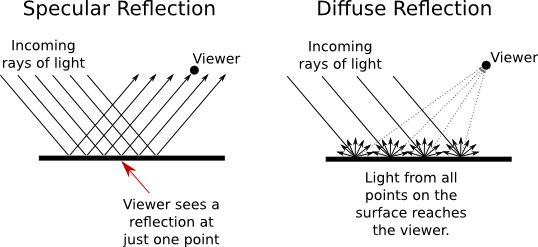
From the image above, phong lighting consists of ambient lighting, diffuse lighting, and specular lighting. Combining these lighting techniques will give a decent visual with a light source.
Ambient & Diffuse Shading

First, I started by adding ambient and diffuse lighting. I began by setting up diffuse shading to simulate the way light disperses when it hits an object. The result was visually pleasing, especially when combined with ambient lighting to suggest indirect light in the environment. The implemtation was also fairly simple and intuitive. If the normal of the surface is similar to the light direction, than the object will appear brighter. A vector dot product is exactly what we need here, because it calculates how much two vectors are going in the same direction.

Spectral Shading
Next, I experimented with a low-poly barrel mesh to get a clear view of both diffuse and specular lighting. The specular lighting was particularly fascinating as it added a sense of shine and reflection to the surfaces.

I was actually really suprised by how well this turned out. The diffuse shading is clear and the spectral lighting makes the barrel have some shine. I also played around with different colors from the light source.

void main()
{
    vec3 lightColor = vec3(1.0, 0.7, 0.4);

    float ambientStrength = 0.1;
    float specularStrength = 2; //really shiny

    vec3 norm = normalize(Normal);

    // diffuse stuff
    vec3 lightDir = normalize(lightPos - FragPos);
    float diff = max(dot(lightDir, norm), 0.0f);
    vec3 diffuse = diff * lightColor;

    //spectral stuff
    vec3 viewDir = normalize(viewPos - FragPos);
    vec3 reflectDir = reflect(-lightDir, norm);
    float spec = pow(max(dot(viewDir, reflectDir), 0.0), 32);
    vec3 specular = specularStrength * spec * lightColor;

    //ambient color
    vec3 ambient = ambientStrength * vec3(1.0, 1.0, 1.0);

    FragColor = texture2D(gSampler, TexCoord0) * vec4(ambient + diffuse + specular, 1.0);
}
This code above is is for the fragment shader. The code is intuitive and I'm definitely going to be playing with more advanced lighting techniques later, such as shadow mapping.
Also, I had a bug when trying to scale my barrel and I'm just going to leave it here. Your browser does not support the video tag.
Wrapping Up
As I delve deeper into the complexities of OpenGL, each step reinforces my passion for computer graphics. I'm excited to see where this journey takes me and how WalkerOGL will evolve with each new feature.
I encourage anyone interested to contribute or provide feedback. Every bit of community interaction is invaluable.
Stay tuned for more technical deep-dives and progress updates on WalkerOGL. Here's to the beauty of computer graphics and the endless possibilities it presents!